Connecting the Shelly 1 to an ET Systems gate motor for Apple HomeKit control
Contents
This post shows how you can connect a Shelly 1 unit to an ET Systems gate motor so that you can open your driveway gate via internet.
In my case I opted to flash the Shelly 1 with the brilliant shelly-homekit firmware so that my whole family can control the gate via Apple’s HomeKit, but you could just as easily make use of the Google Assistant or the Home Assistant integrations.
The more important part of this post is how to wire up everything correctly.
Wiring up the Shelly to the ET systems gate motor
At the highest level: We are going to connect the Shelly to the ET Systems
control card’s 12V supply, and then we’re going to use the Shelly’s relay to
briefly pull the Bt (button) input on the control card to low in order to open
the gate.
Note that the existing remotes only have a single button to open the gate. It closes by itself after a few seconds, but also checks for cars and pedestrians passing through.
In order to get the Shelly 1 to enable the pressing of that one button via the internet, you will have to wire things up as shown in the illustration below:
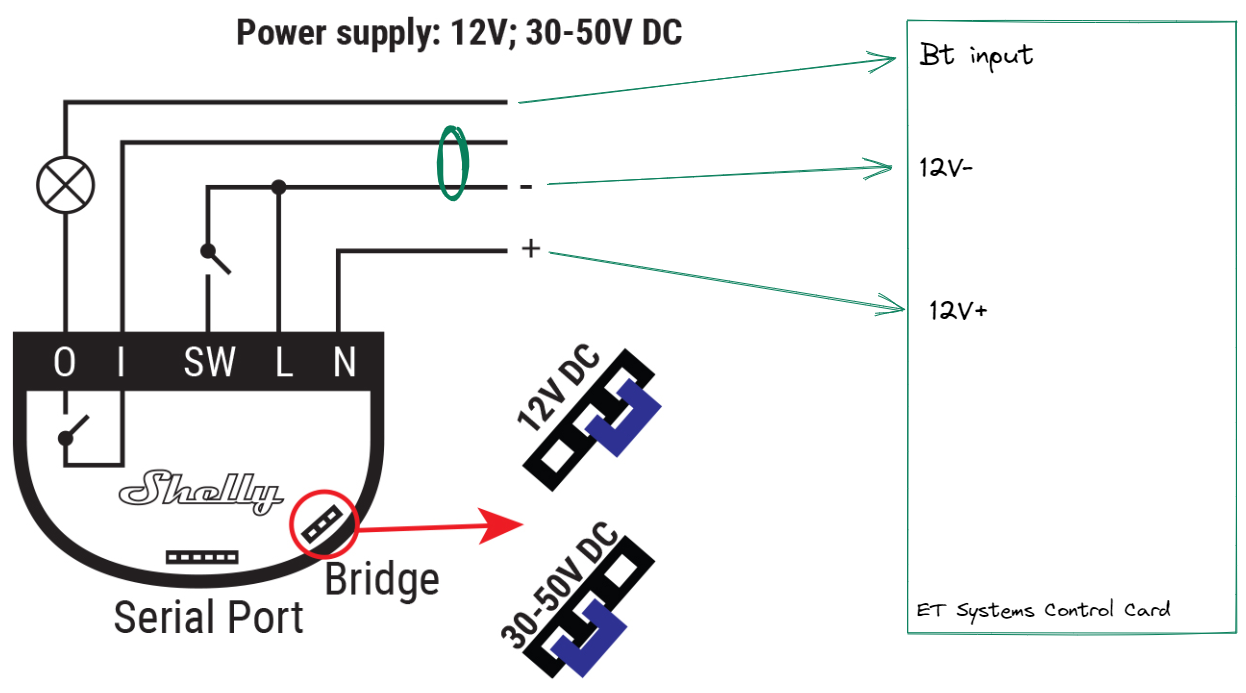
Figure 1: Wiring between Shelly 1 and ET Systems motor control card.
- Remember to switch the Shelly 1 to 12V DC by changing the bridge jumper, encircled in red in the illustration. You will have to pop open the casing of the Shelly to do this.
- Bring out three wires from the control card:
12V+,12V-andBt. - Connect from control card to Shelly:
12V+toN12V-toLBttoO
- IMPORTANT: With a small wire, also connect
LtoIon the Shelly.
As you can see, when the Shelly activates, it will connect I to O, meaning that
O (and hence Bt) will go to 12V-, which will open the gate.
For this to work, the switch must be configured as a momentary with an auto-off of about 0.5 seconds. See further down.
After wiring up, mine looked like this:
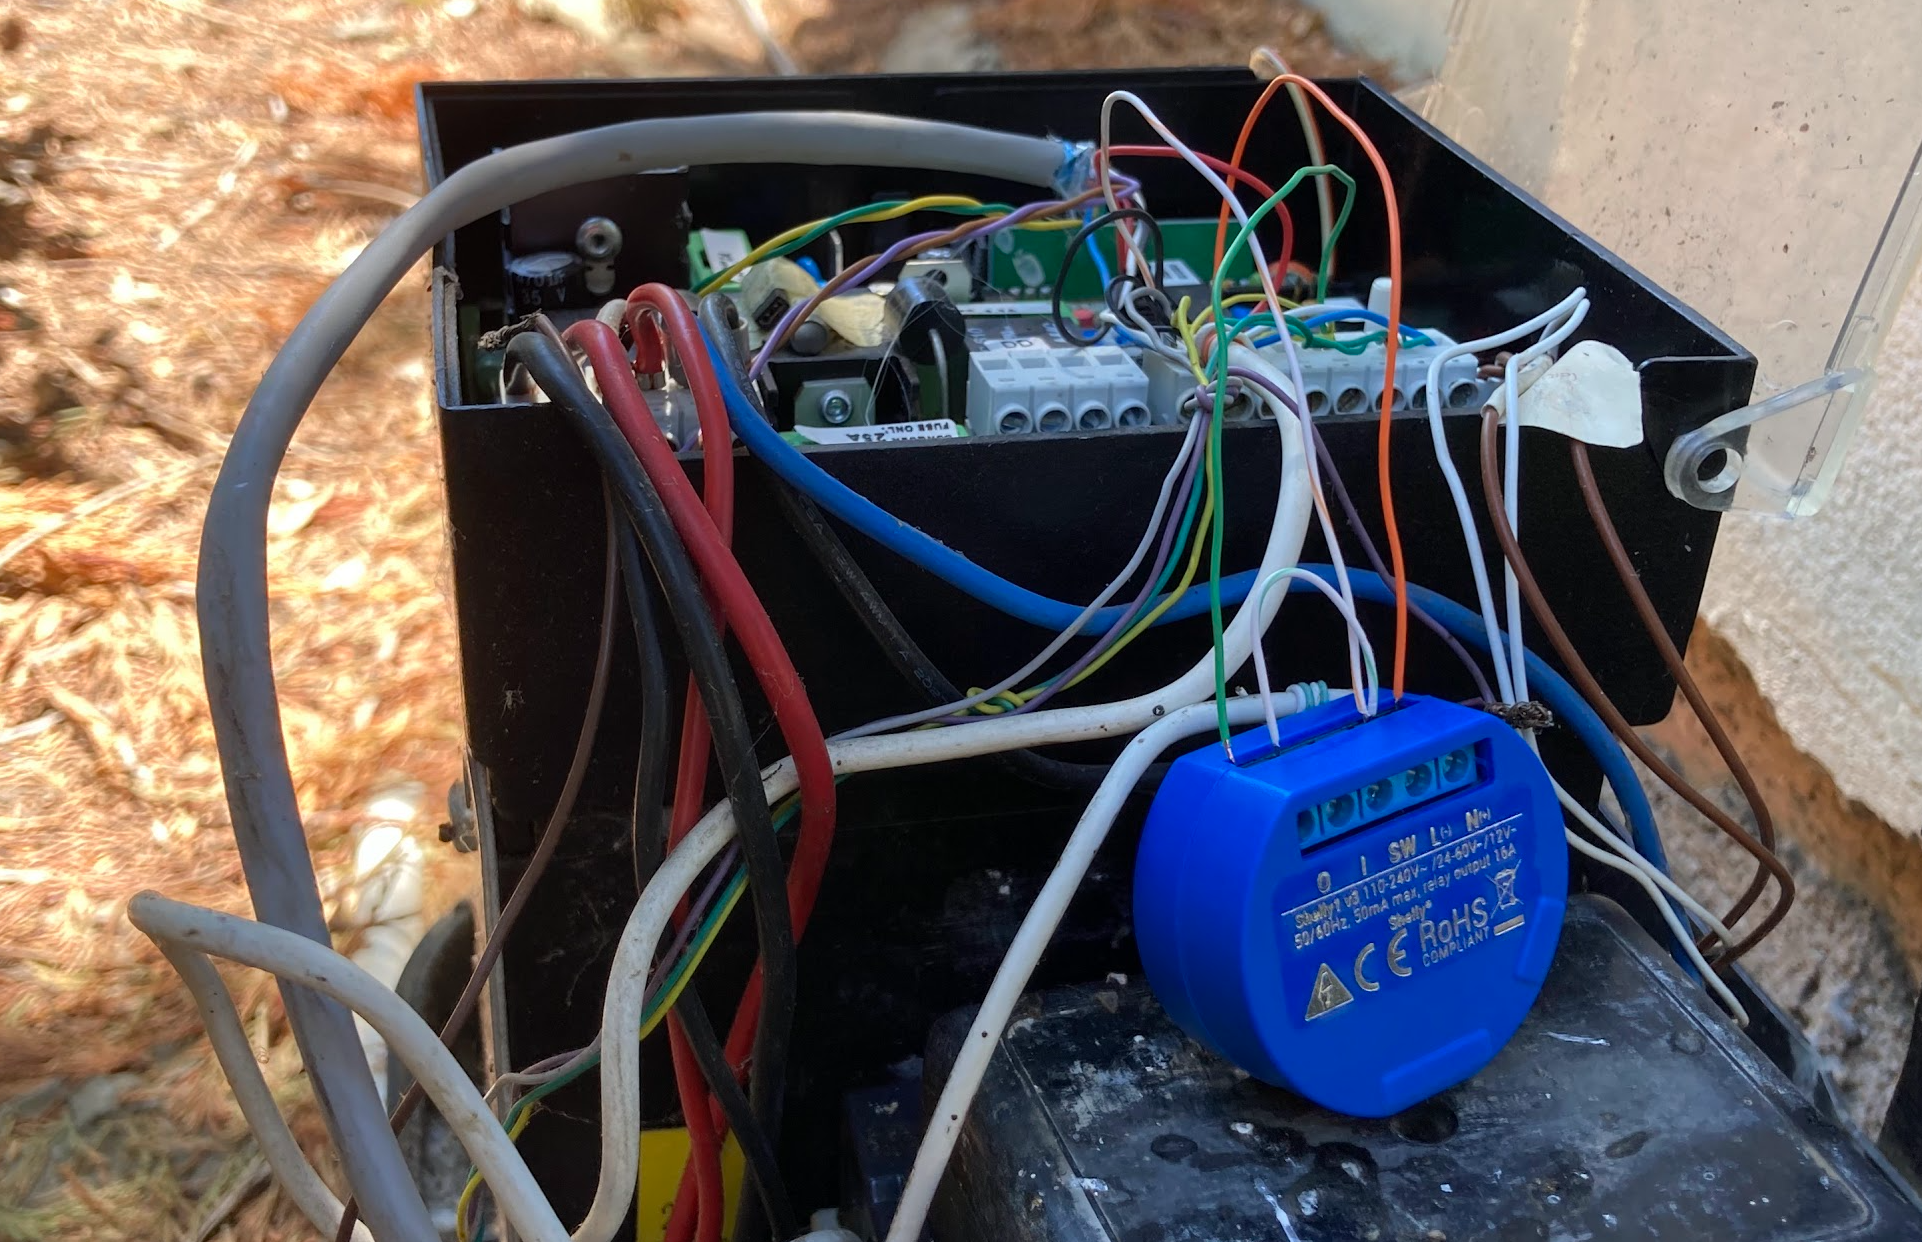
Due to already installed sensors and controls, I had to work quite carefully to add these new wires to the chaos that you see without disrupting current functioning.
For reference, we show the connections on the ET system control card below, taken from page 19 of the ET-500-Plus installation manual:
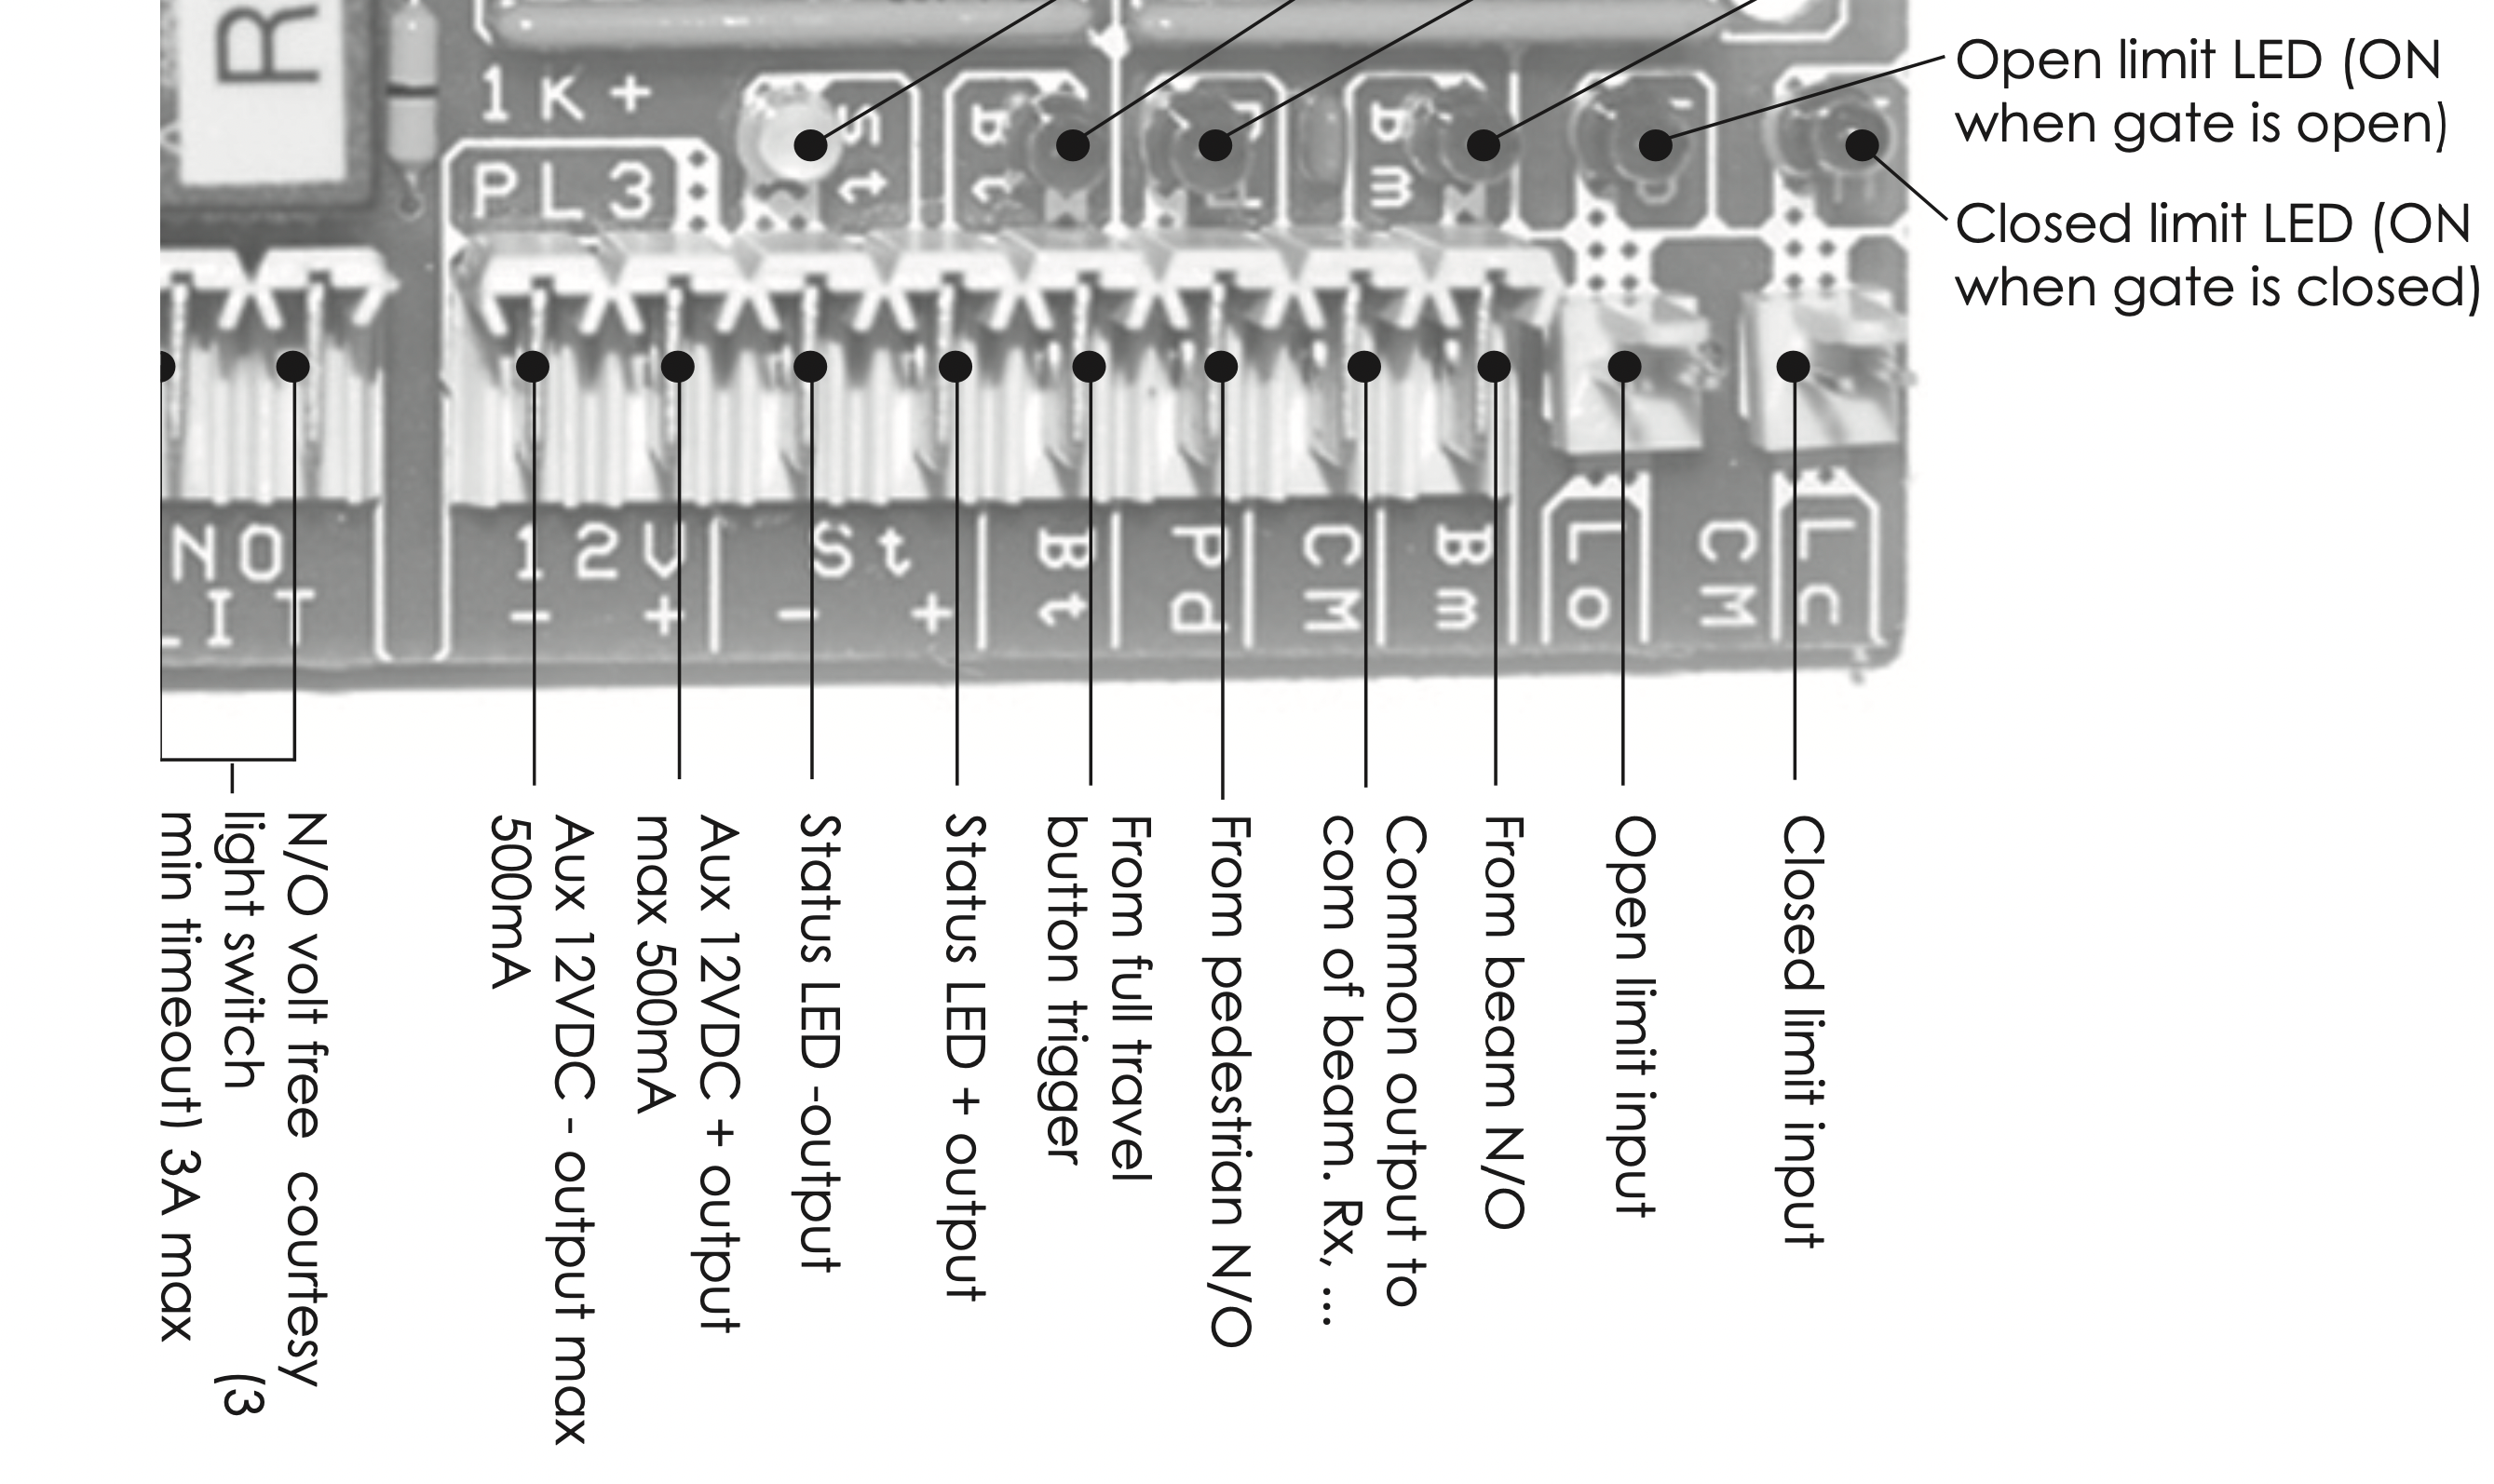
Figure 2: Connectors on the ET Systems control card.
Initial configuration of the Shelly 1
Once the Shelly is powered up by the connected 12V, you should be able to see
it as a new WiFi access point named shelly-ID.
Connect to that access point, and then browse to 192.168.33.1.
Using this web-ui, first connect the Shelly to your house’s WiFi access point as a client, after which you should be able to find the new IP number in your router’s DHCP list.
(At this point, I configured my router to assign a fixed IP number to the Shelly’s MAC address, but that’s not a requirement.)
Connect to the new IP, and then use the web-ui to update the stock Shelly
firmware (menu under Settings) to the latest version.
Flash to HomeKit
Flash to shelly-homekit by browsing to
http://A.B.C.D/ota?url=http://rojer.me/files/shelly/shelly-homekit-Shelly1.zip
where A.B.C.D is the current IP number of the Shelly 1.
The official installation instructions link to this helpful video if you’re unsure how this would work, but it is fortunately pretty uneventful if you enter the correct URL.
After a minute or two, you can reload your browser on the Shelly 1 IP, and you should see a brand new web UI!
Configure the switch
Most importantly, setup the switch correctly as shown below:
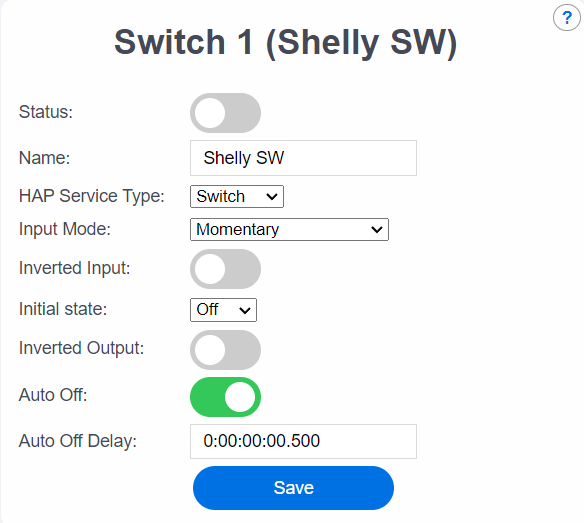
- Service Type: switch
- Input mode: Momentary
- Initial state: off
- Auto off: CHECKED
- Auto off delay:
0:00:00:00.500which is half a second. - Remember to click the “Save” button
After that, click on “Setup” under HomeKit settings, at which point you’ll see a QR code.
Add to HomeKit
In the Apple Home app on your iPhone or iPad, tap the + at the top right,
select “Add accessory” and then scan the QR Code.
Follow the rest of the prompts to get the switch added.
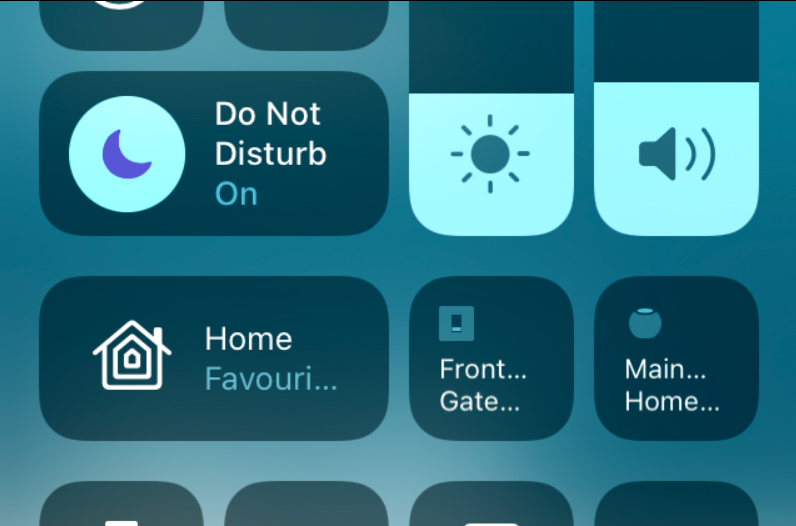
Now when I swipe up to get the control center, I or any of my family can open the gate with a tap of the button!
Miscellaneous notes
When you’re connected to your home’s wifi, you’ll be able to control the gate.
However, if you also want to do so remotely, or you want to grant other users access to your home, you’ll need a HomePod, Apple TV or iPad (at home) to act as the “home hub”. See Apple’s documentation for more details.