Developing Arduino sketches with JetBrains CLion: A minimal example.
Contents
The official Arduino Desktop IDE is fantastic at what it was made for. After downloading, opening your first sketch (say, blink.ino) and flashing this to your connected Arduino hardware takes all of 3 seconds.
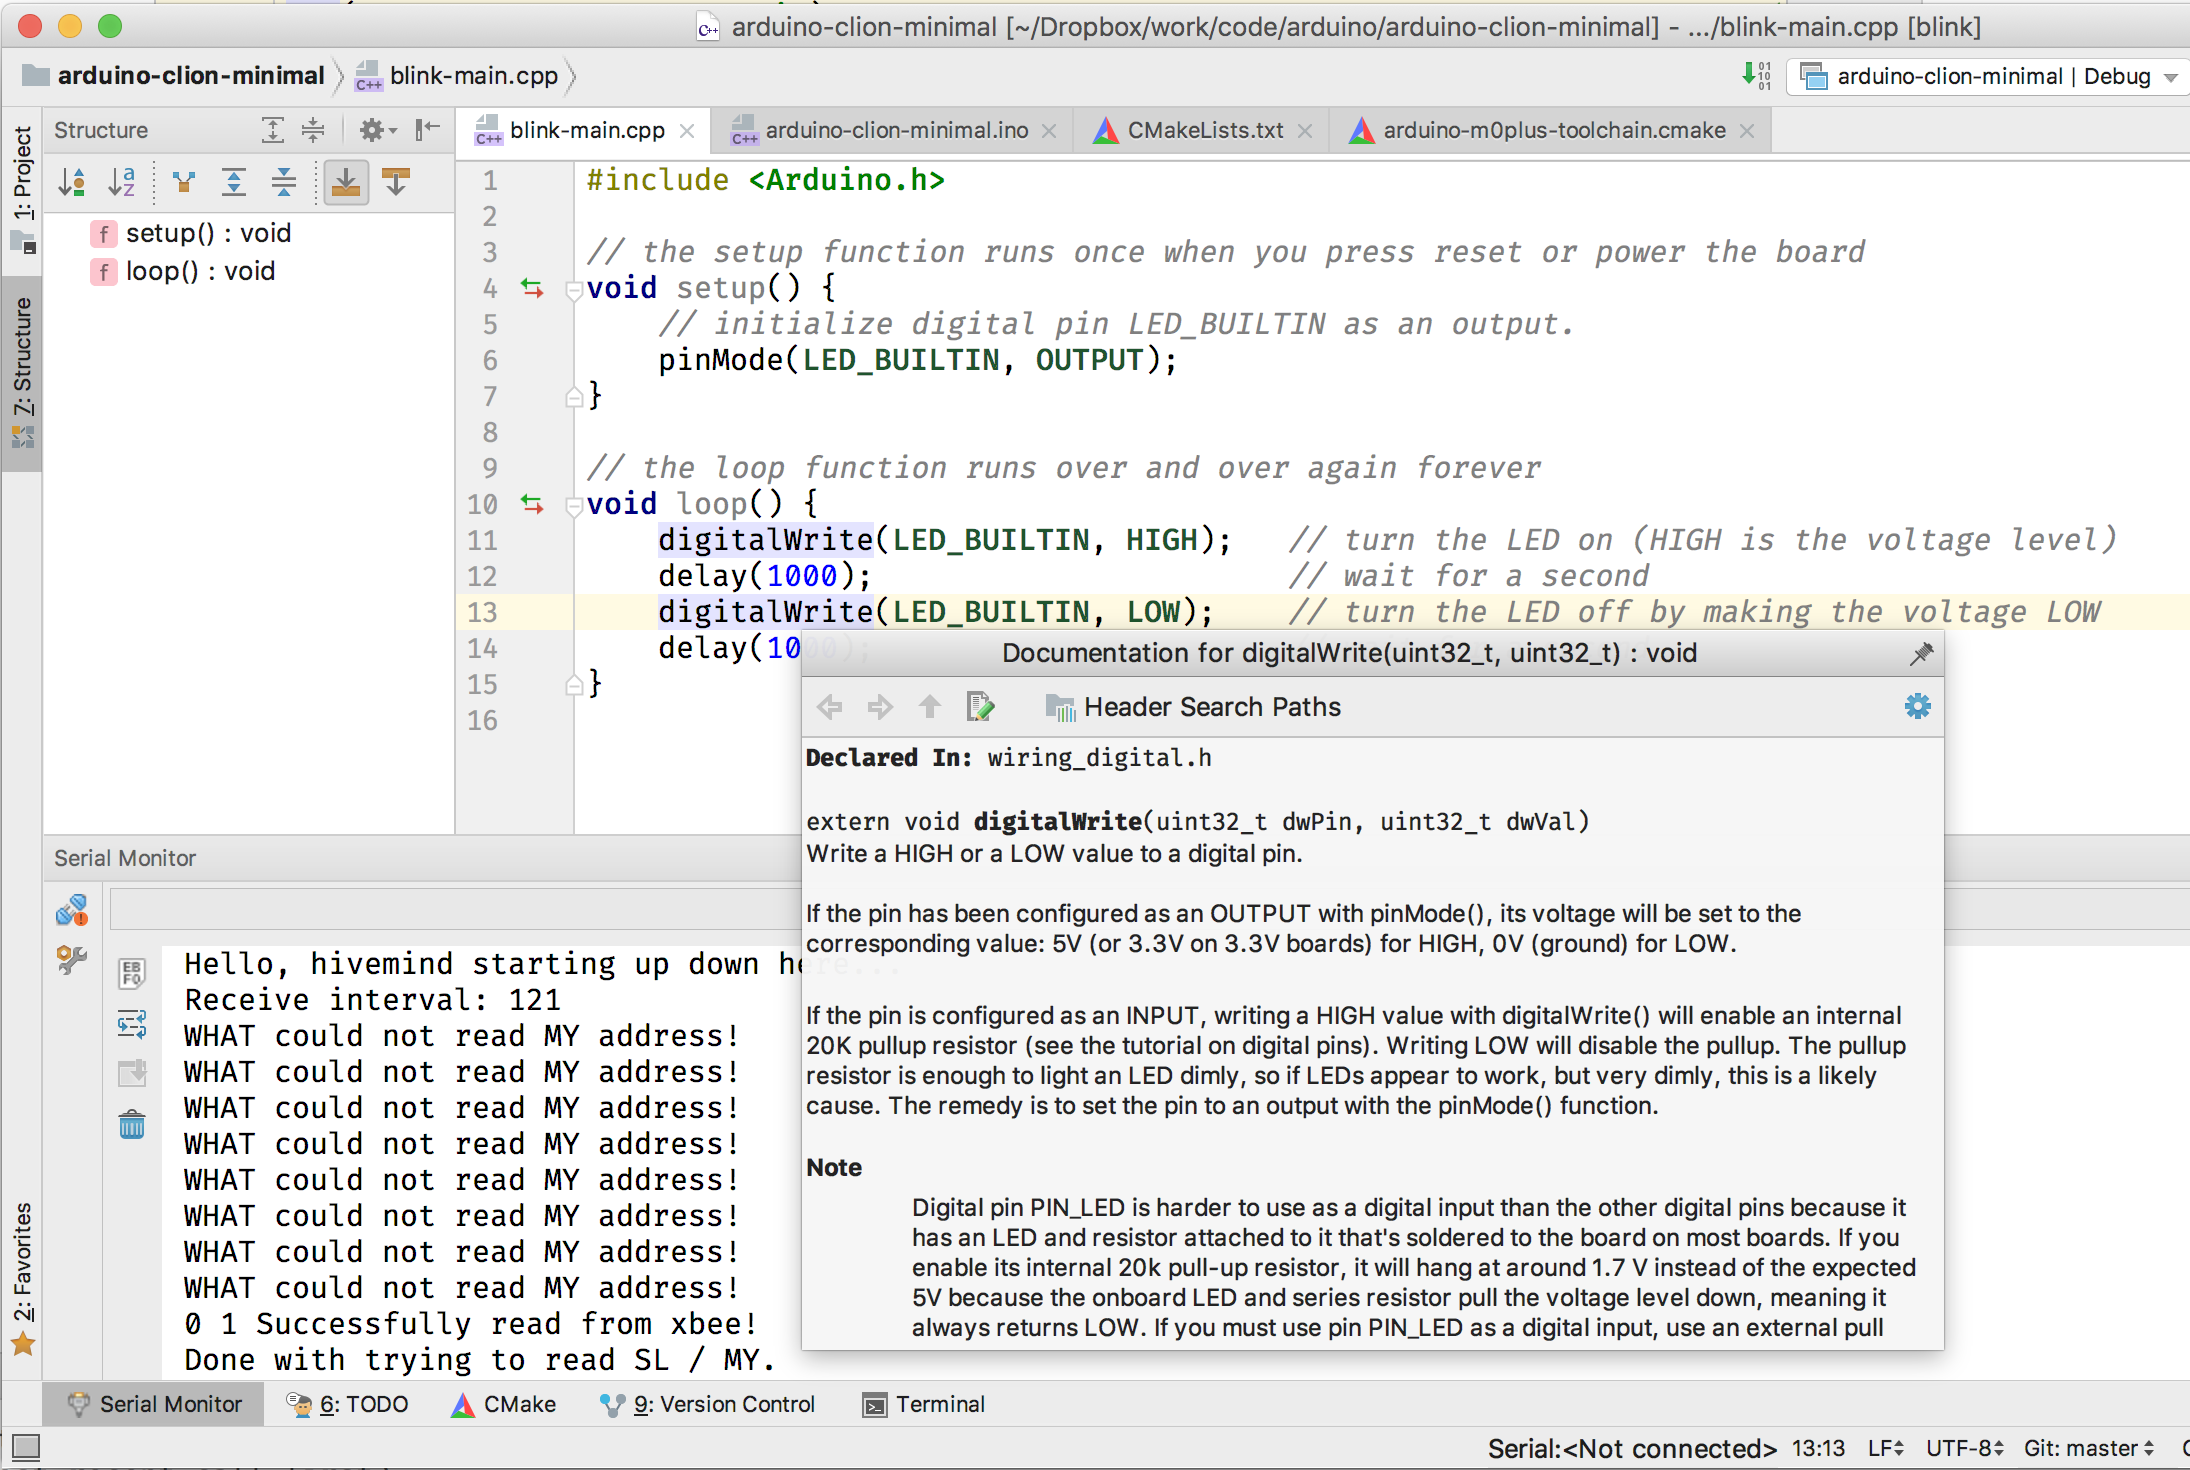
However, once your sketches become a little more complex, a more sophisticated IDE with code navigation, documentation and context-sensitive completion can be a great help.
Currently, one of the better solutions is the Arduino extension for Visual Studio Code. You can be up and running quite quickly, and after adding the necessary include directories to your config, the built-in IntelliSense C++ helps immensely with code completion, navigation and inline documentation.
Overview of this barebones solution
However, this post is about getting CLion working with your Arduino projects, without using any additional software besides the Arduino IDE and CLion.
It’s slightly less straight-forward than with Visual Studio Code, but could be worth it, as CLion is arguably a better C++ and general programming IDE than Visual Studio Code.
The core of the solution is to create a cmake toolchain file for the Arduino, based on compilation parameters extracted from a verbose run of the Arduino Desktop IDE 1.8.5 in command-line mode.
Furthermore, it is important that all sketch code is moved out into .cpp files, and the necessary includes (importantly Arduino.h) and function prototypes are added. The main .ino (sketch) file has to be maintained with the same name as the containing directory, but it can be empty, which is what I usually do.
There are CLion arduino plugins which you could try (I could not get any of them working completely), but with this minimal example, you get to know exactly what is going on behind the scenes.
Up and running CLion, cmake and the blink example
To get you started, I have converted the minimal stock Arduino blink sketch to a CLion-compatible project, including toolchain files for the AVR-based Uno and for the ARM-based M0 boards, and made it available on github as arduino-clion-minimal. You can easily modify your existing projects by just copying and modifying the CMakeLists.txt and the relevant toolchain file.
To try out CLionized blink, clone this repo, then open it with CLion.
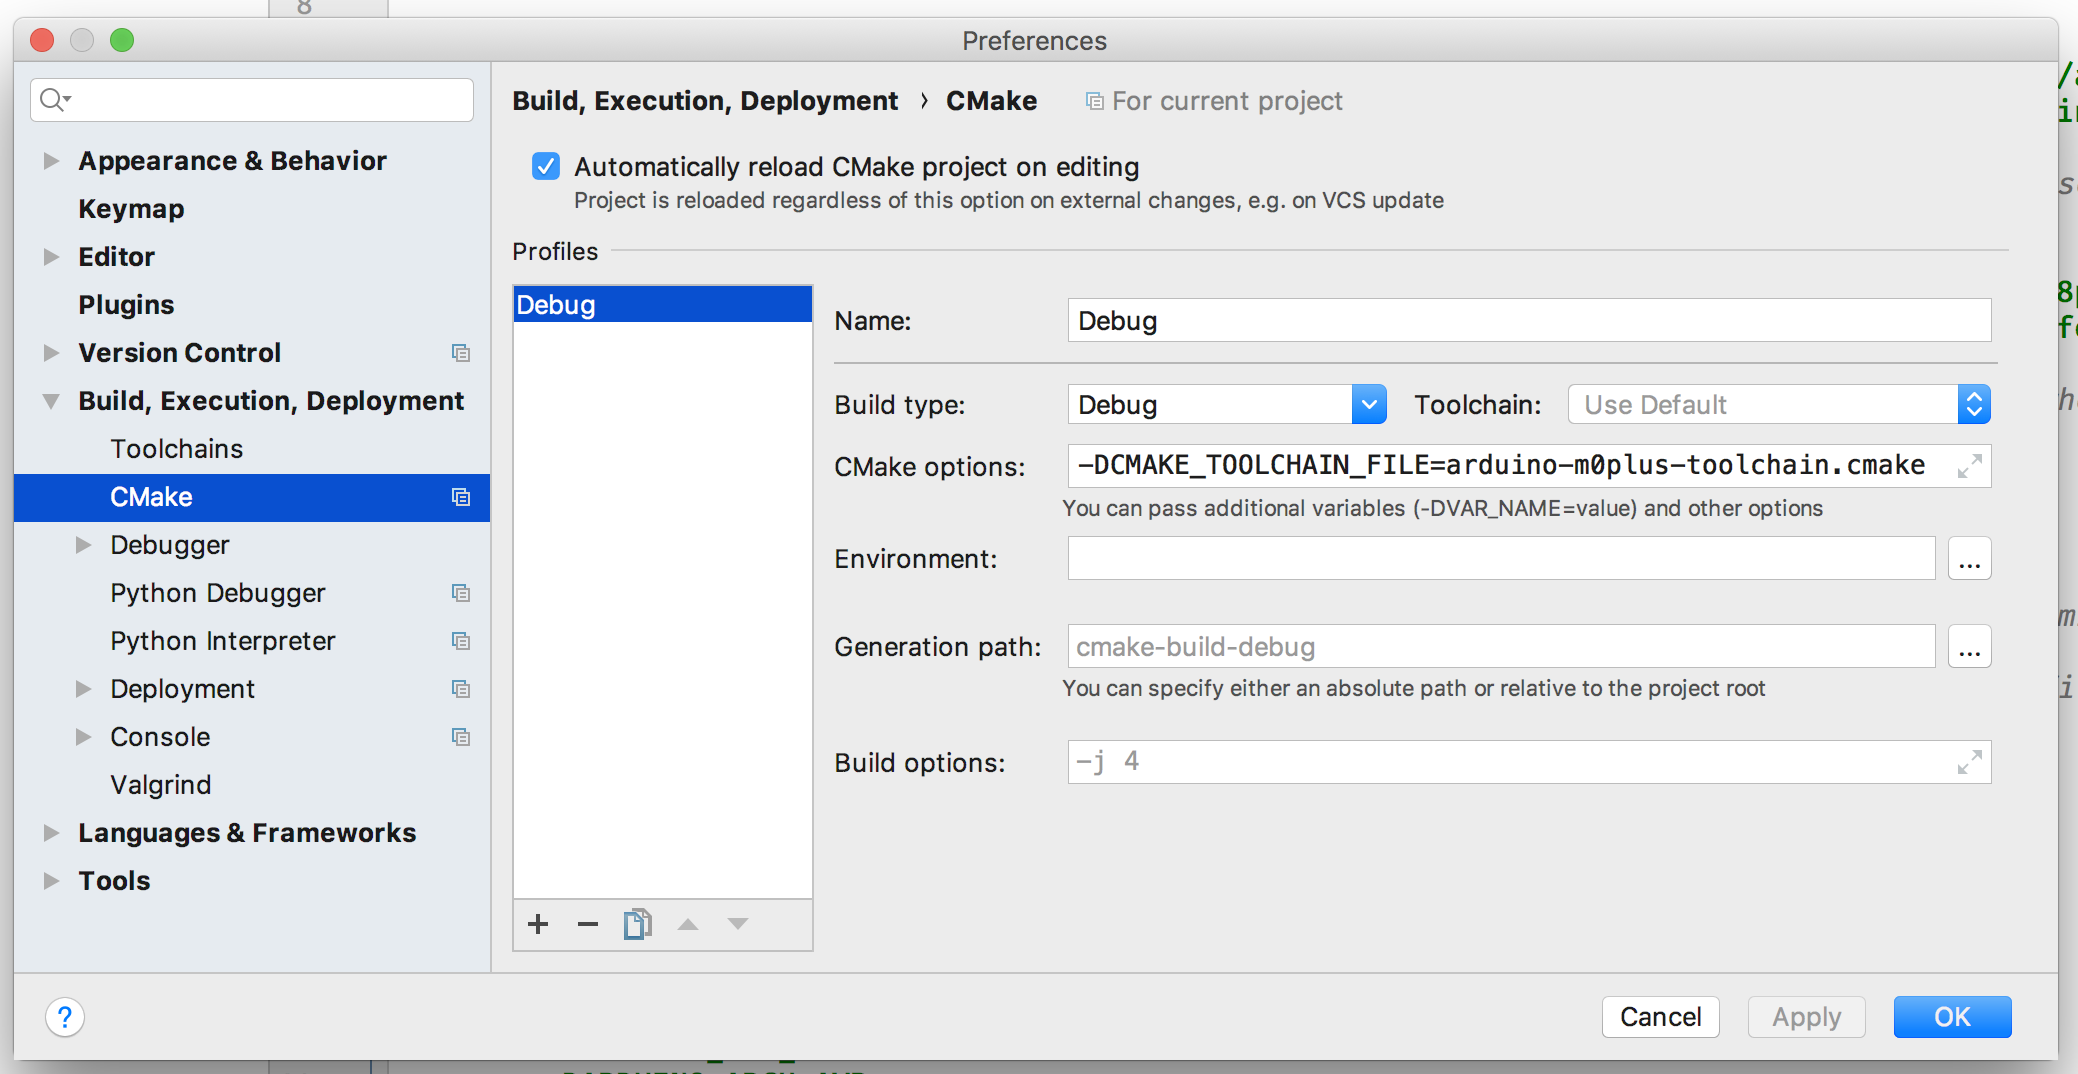
Importantly, go to Preferences | build, execution, deployment | CMake and then add -DCMAKE_TOOLCHAIN_FILE=arduino-uno-toolchain.cmake or -DCMAKE_TOOLCHAIN_FILE=arduino-m0plus-toolchain.cmake (my current favourite Arduino hardware!) depending on your hardware platform.
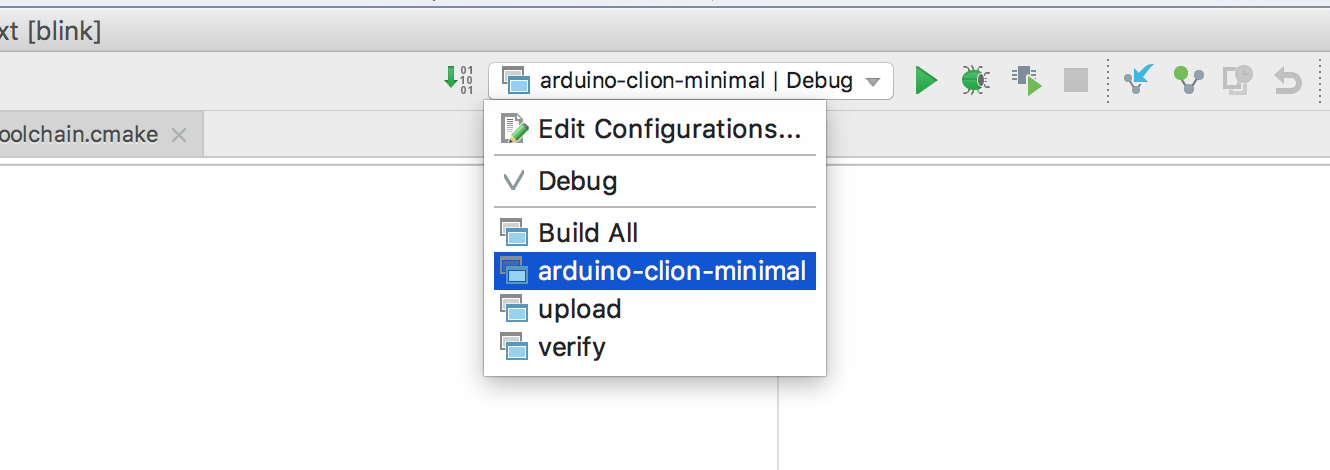
After opening, you should now have three build (Ctrl-F9 – the button to the left of the target selection, NOT run) targets at the top right of the CLion UI: arduino-clion-minimal for quick compile-only checks, verify for full arduino building, and upload for full arduino building and uploading:
Before you upload, make sure that you’ve selected the correct board type and port with the Arduino desktop IDE.
Conclusions
With this simple setup, you should have access to all of CLion’s programming facilities during the development of your Arduino sketches.
Furthermore, Dmitry Cherkas’s Serial Port Monitor plugin can be used as Arduino serial port monitor for a more fully integrated experience.
Let me know in the comments how it went!