Miniconda3, TensorFlow, Keras on Google Compute Engine GPU instance: The step-by-step guide.
Contents
Google recently announced the availability of GPUs on Google Compute Engine instances. For my deep learning experiments, I often need more beefy GPUs than the puny GTX 750Ti in my desktop workstation, so this was good news. To make the GCE offering even more attractive, their GPU instances are also available in their EU datacenters, which is in terms of latency a big plus for me here on the Southern tip of the African continent.
Last night I had some time to try this out, and in this post I would like to share with you all the steps I took to:
- Get a GCE instance with GPU up and running with miniconda, TensorFlow and Keras
- Create a reusable disk image with all software pre-installed so that I could bring up new instances ready-to-roll at the drop of a hat.
- Apply the pre-trained Resnet50 deep neural network on images from the web, as a demonstration that the above works. Thanks to Keras, this step is fun and fantastically straight-forward.
Pre-requisites
I started by creating a project for this work. On the Compute Engine console, check that this project is active at the top.
Before I was able to allocate GPUs to my instance, I had to fill in the “request quote increase” form available from the Compute Engine quotas page. My request for two GPUs in the EU region was approved within minutes.
I installed my client workstation’s id_rsa.pub public SSH key as a project-wide SSH key via the metadata screen.
Start an instance for the first time
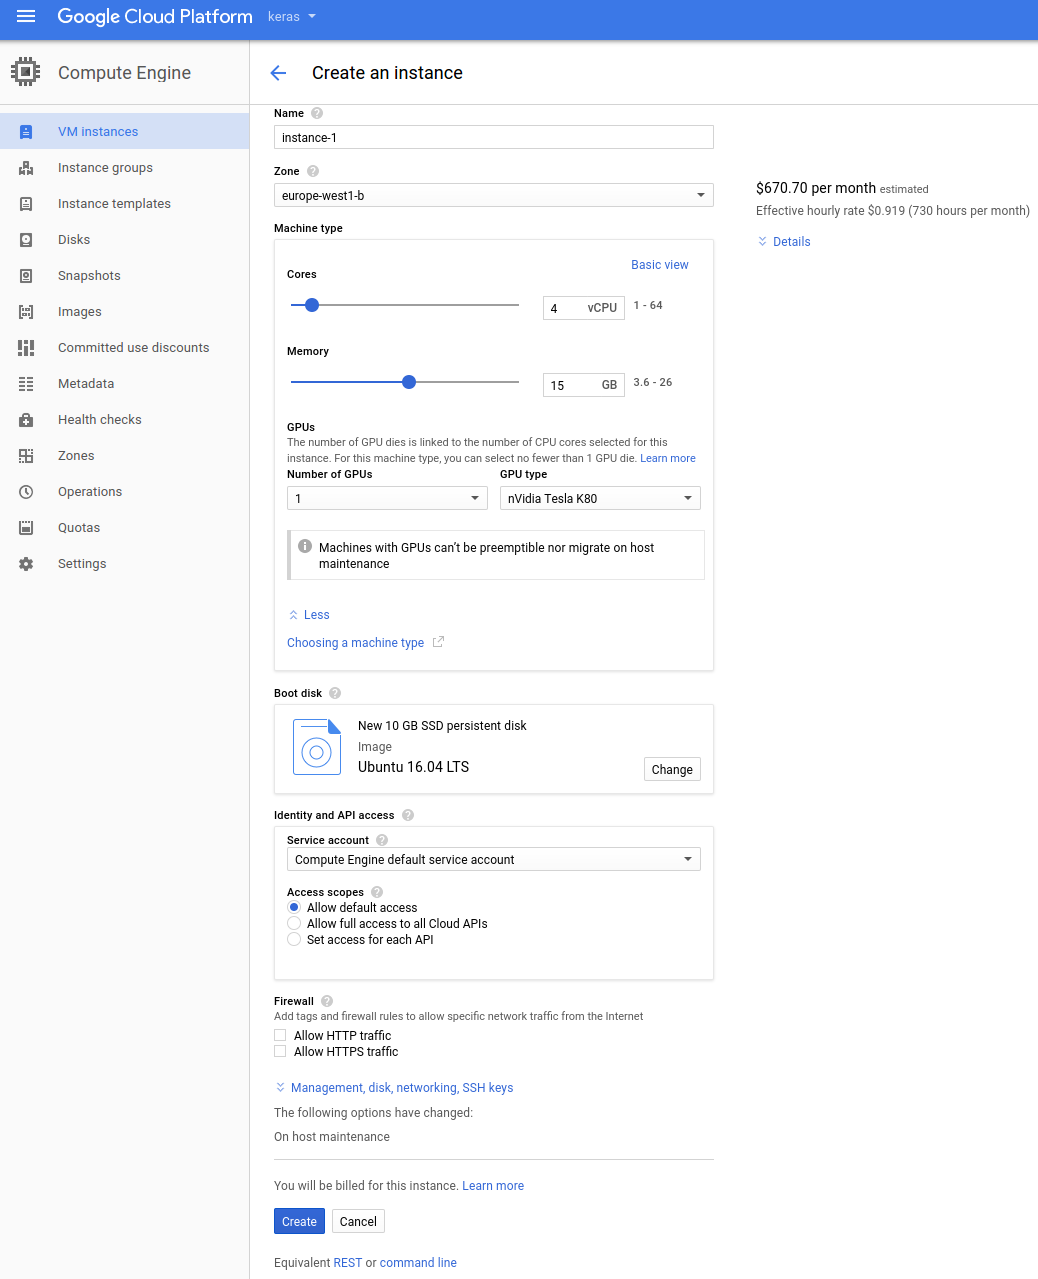
I configured my GPU instance as shown in the following screenshot:
-
Under
Machine typeswitch toCustomizeto be able to select a GPU. - I selected an Ubuntu 16.04 image, and changed the persistent disk to SSD.
-
I selected the
europe-west1-bzone. Choose whatever is closest for you. The interface will warn you if the selection does NOT support GPUs.
After this, click on the Create button and wait for your instance to become ready.
Once it’s up and running, you’ll be able to ssh to the displayed public IP. I used the ssh on my client workstation, but of course you could opt for the Google-supplied web-based versions.
Install NVIDIA drivers and CUDA
I used the following handy script from the relevant GCE documentation:
|
|
After this, download the CUDNN debs from the NVIDIA download site using your
developer account. Install the two debs using dpkg -i.
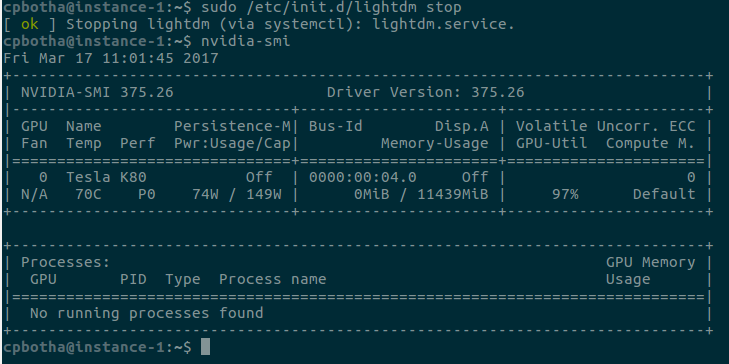
To confirm that the drivers have been installed, run the
nvidia-smi command:

Install miniconda, tensorflow and keras
I usually download the 64bit Linux miniconda installer from conda.io and then install it into ~/miniconda3 by running the downloaded .sh script.
After this, I installed TensorFlow 1.0.1 and Keras 2.0.1 into a new conda environment by doing:
|
|
The keras package also installed theano, which I then uninstalled
using pip uninstall theano in the active ml
environment.
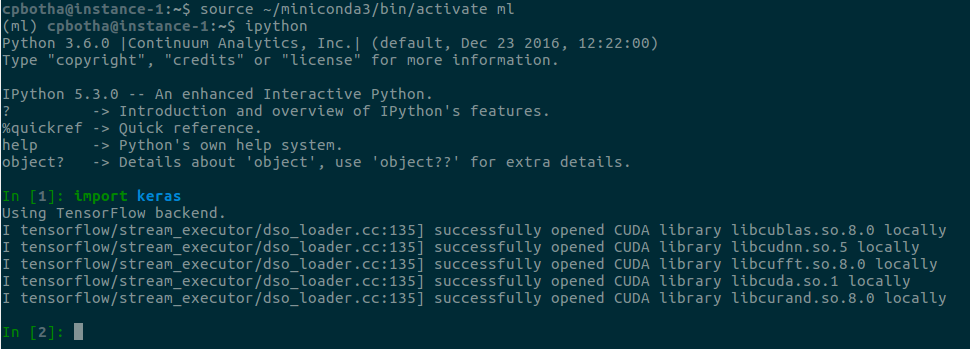
To test, run ipython and then type import keras. It
should look like this:
Note that it’s picking up the TensorFlow backend, and successfully loading all of the CUDA librarias, including CUDNN.
Save your disk as an image for later
You will get billed for each minute that the instance is running. You also get billed for persistent disks that are still around, even if they are not used by any instance.
Creating a reusable disk image will enable you to delete instances and disks, and later to restart an instance with all of your software already installed.
To do this, follow the steps in the documentation, which I paraphrase and extend here:
- Stop the instance.
- In the instance list, click on the instance name itself; this will take you to the edit screen.
-
Click the edit button, and then uncheck
Delete boot disk when instance is deleted. - Click the save button.
-
Delete the instance, but double-check that
delete boot diskis unchecked in the confirmation dialog. -
Now go to the
Imagesscreen and selectCreate Imagewith the boot disk as source.
Next time, go to the Images screen, select your image and then select Create Instance. That instance will come with all of your goodies ready to go!
Apply the ResNet50 neural network on images from the interwebs
After connecting to the instance with an SSH port redirect:
|
|
… and then starting a jupyter notebook on the GCE instance:
|
|
So that I can connect to the notebook on my localhost:8889, I
enter and execute the following code (adapted from the Keras documentation) in
a cell:
|
|
In the next cell, I do:
|
|
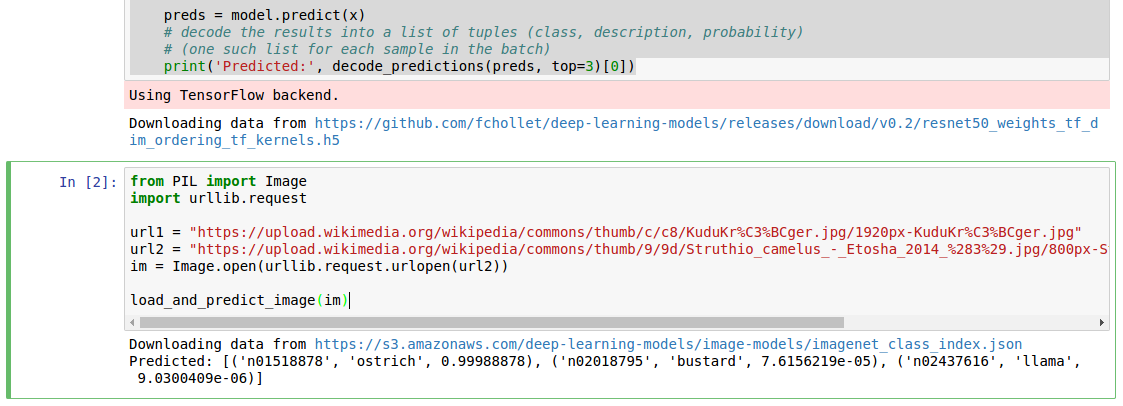
To be greeted with the following results:
The pre-trained ResNet50 network identified the Kudu I gave it initially as an ostrich, so I decided to make it a bit easier for the poor network by actually giving it an ostrich, which it did identify with a 99.98% probability.
Looking at the photos, the former taken in the Kruger National Park and the second in Etosha, I can image that the network could identify the former as the latter due to similar background and foreground colouring, and clearly having not been trained on Kudu.
Let’s file that under future work!


